Teacher desk decor can range from super cute and personalized to nonexistent. There are few places that students don’t have access to and those are your chance to make your space feel more like your home away from home. You can decorate and organize classroom bookcases and even your computer teacher desktop.
If your classroom supplies budget is already at a negative balance, you will have to take more of a DIY approach to your decorations as opposed to heading to the nearest home furnishings store to buy your desk accessories.
Sitting at my desk one day, I needed to grab a colored marker as I was getting ready to grade a stack of comprehension tests during my planning period. I slide open the desk drawer and stuck my hand in only to:
- get stabbed by a pushpin rolling around in it
- get a cough drop stuck to my hand due to it being hot in my room and melting through the wrapper
- then, have a nickel also stuck to man from the ooze of said cough drop also creating a mess on everything around it
- and – all while still digging through the rolling mess of paper clips, writing utensils, change, gum, stickers, thumbtacks, scissors, and other various office supplies while still on the hunt for a simple marker so I could cross grading these tests off my to fo list in the limited planning time I had.
There had to be a better way to organize this desk drawer…
I thought a fun DIY tutorial would be a great post – and this one is super simple and fun! Have a drawer you need to organize? Well, if you have to organize it anyway, might as well make it cute along the way!
This is so easy, you can complete it in an hour or less!
How to Organize a Teacher Desk
Step One: Empty a drawer (that step might take you a little longer than the other project – lol).
Step Two: Grab some empty jewelry boxes. You might have a bunch sitting in your jewelry box already, and if so – score! If you don’t have any laying around, I found mine at the local craft store, at a cost of less than $10 for 4 packages all in different sizes.
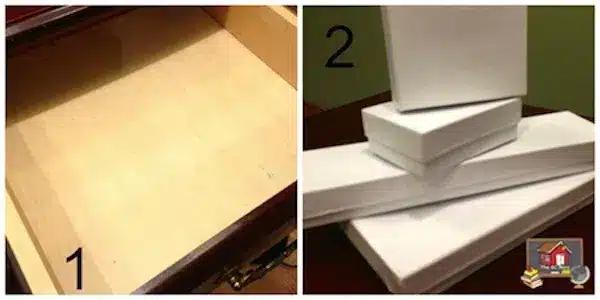
Step Three: Set up the jewelry boxes in your desk drawer however you like best! Tip: Take a picture of this arrangement so when you start pulling the boxes back out to add your inserts, you don’t have to remember what goes where.
Step Four: Grab some washi tape (mine came mostly from Downtown Tape) in any color combo you like. Pull off a little piece of tape and place it in each box so you can see how your colors and patterns will play out in the final version.
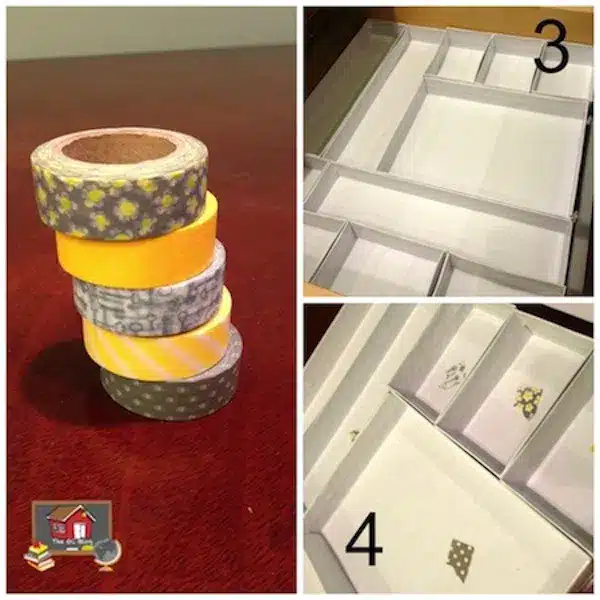
Next, I actually pulled the boxes out of the drawer and replicated the same design on my worktable just so I had more room to work. You will also need plain cardstock in any color you choose and either scissors or a paper cutter. I didn’t end up using the ruler.

Step Five: Place some tape for your first box on the cardstock. Try to match up the patterns as best as possible when you are lining up the strips.
Step Six: Take your box and place it on top of the tape. Use a pencil to trace the box shape on top of the tape.
Step 7: Use the paper cutter or scissors to cut on the lines – or even slightly inside so it fits nicely in the box.
Step 8: Take your insert and place it inside the box. You can choose to tape it or glue it in if you prefer for it not to move at all. Personally, I like letting it sit unattached because if you choose to change your colors or arrangement at any time, just flip the box over and replace with a new taped cardstock piece.
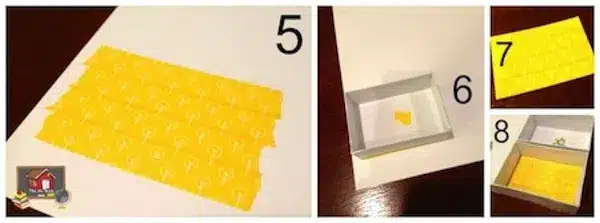
Below is another finished box in the set.
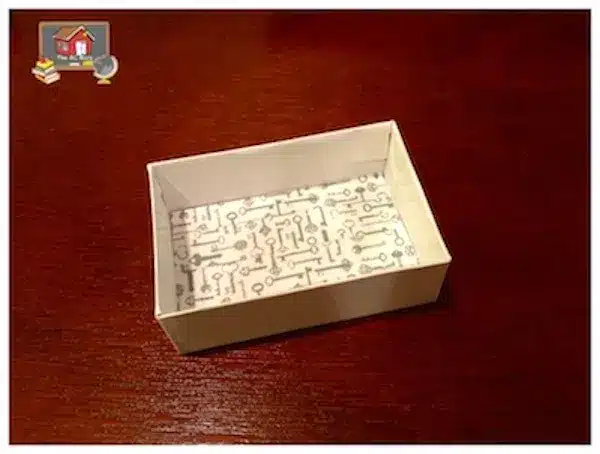
After you finish all the boxes, put them back into your drawer! I set up mine so they all jigsawed in there wonderfully, but if you aren’t so lucky or choose not to jigsaw them in, you can hot glue the boxes together so they don’t move and/or hot glue them in place inside the drawer. Too cute!
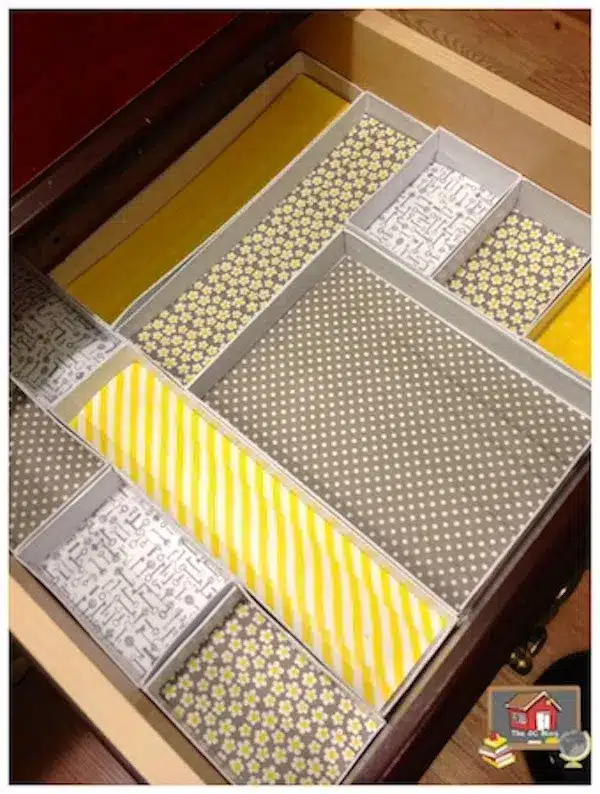
Add your supplies as you like!

Have fun organizing your custom desk drawers! You can update them as little or as much as you like, and you can coordinate your colors with your classroom theme! Yay!
What other fun teacher desk straightening tips do you have? We would love to hear them in the comments below!
Don’t forget to grab your free grade level burlap banner too for a little extra pop behind your desk! This file has grade levels from preschool to twelfth grade so everyone is covered! Enjoy!

~Charity

This post originally appeared at Organized Classroom.


Leave a Reply